DIY: Fluffy Snowman Fun Craft That Requires No Snow
Who is ready to have a little DIY snowman fun?

DIY: Fluffy Snowman Craft
Below you will find directions as well as pictures on how to make a fluffy snowman using cotton balls and toilet paper rolls. Chances are you already have everything you will need on hand to make this craft project.
This makes for a great winter craft for the kiddos to do when they are trapped indoors.
If you are looking for other easy craft projects, here are a few to check out.
- Clothespin Kid Craft Project – Bird Buddies
- DIY Hand Puppet
- Minions Shoes DIY
- DIY Imprint Bleach Shirt
Supplies Needed:
- 2 Cardboard Tubes (Toilet tissue size)
- 13 Cotton Balls
- Scissors
- School Glue
- Construction Paper
- Cardboard
- Hot Glue
- Hole Punch
- 2 Eyes (Dollar Tree has a bag for $1)
- Black Marker

How To Make This Craft Project:
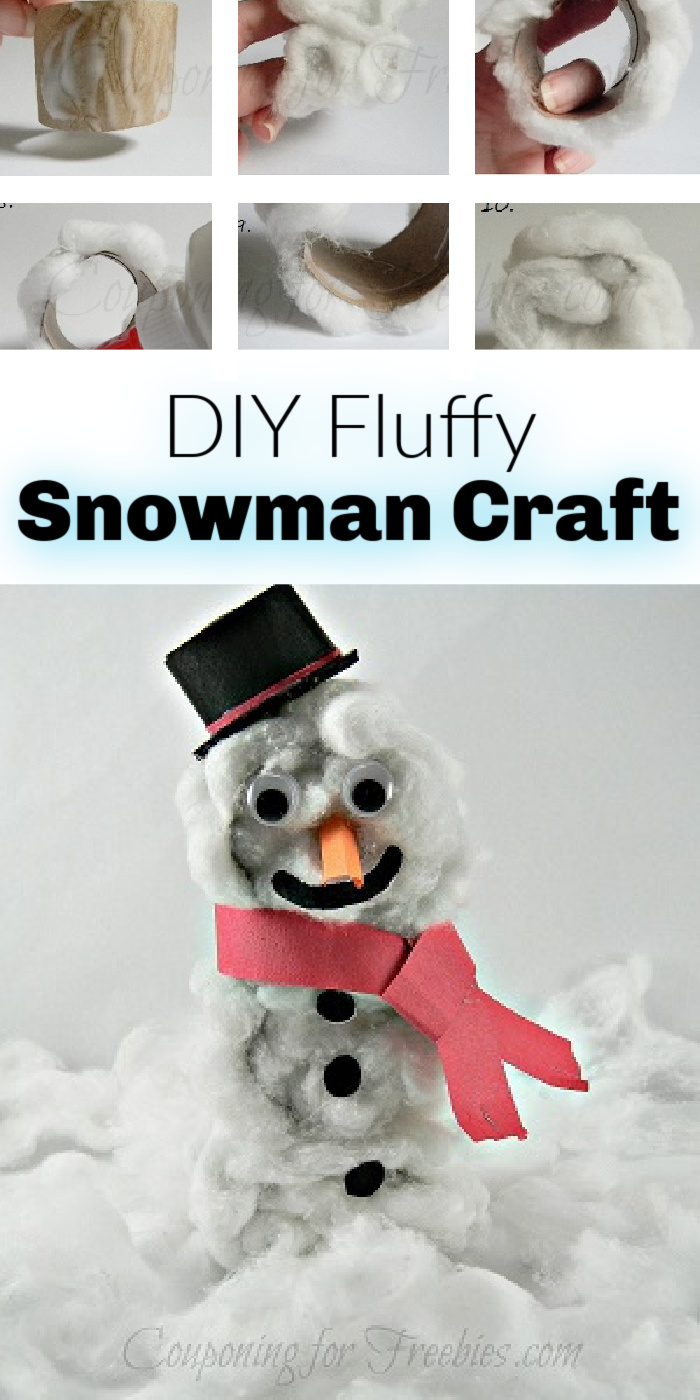
Take the cardboard tube and cut it into three equal pieces. Then take twelve of the cotton balls and pull them slightly apart so that are nice and fluffy.
On the outside of the cut tube, cover it in glue, then cover it in the fluffed cotton balls. You should need two on each piece.
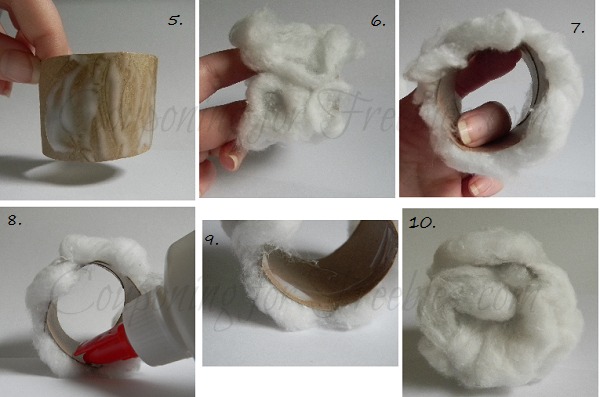
Now on the inside edge of the tube, run a bead of glue around both sides. Carefully place a fluffed cotton ball inside the tube on both sides.
After the glue has dried from the cotton balls, we need to glue them together. You will be gluing them so that the open sides of the tubes face the outside.
Use the hot glue gun and glue them in place, stacking them one on top of the other.
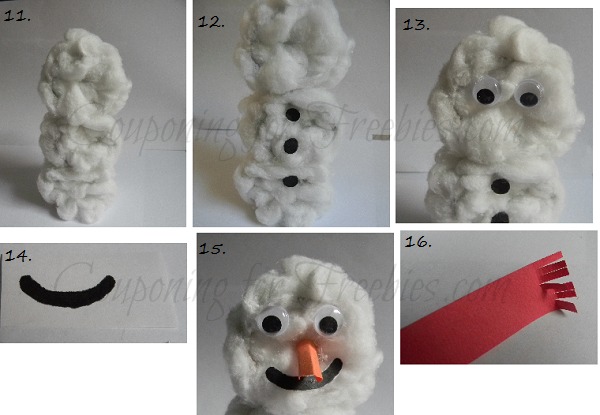
Take the hole punch and punch out three round buttons. You can either use black construction or color a sheet of paper black.
Glue the three dots down one flat side of the snowman.
Glue the two eyes at the top on the same side you just did the buttons.
Now draw a black smile on a piece of paper and cut it out. Then glue it on the lower part of the piece the eyes are on.
Grab a small piece of orange construction paper and cut out a triangle and fold it in half lengthwise and glue it between the eyes and the smile.
Take a red piece of construction paper and cut a piece about ¼ inch wide, the whole length of the paper. After you have that cut, put small slits at each end so that it looks like fringes.
Wrap the scarf around the neck of the snowman and use a dot of hot glue. You can just glue it to itself and not to the snowman.
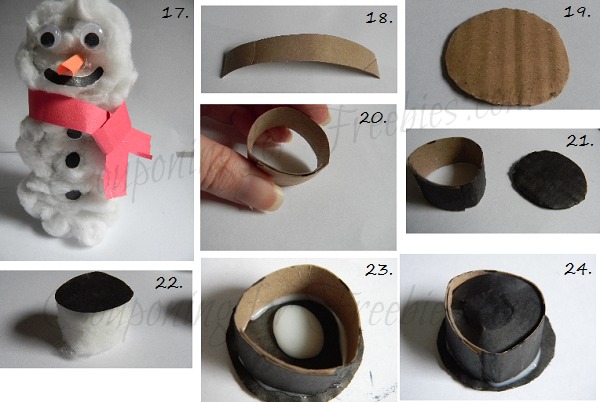
Making & Adding The Hat:
Now for the hat. Cut a piece of the other cardboard tube off. Make it about a half-inch wide. Then cut it so that it opens and can lay flat.
Now roll it so that it overlaps by about half-inch, hot glue it in place. Then take a small piece of cardboard and cut a piece slightly bigger than the last piece.
On a sheet of paper (black construction paper) place the tube ring on it, then take a marker and run it around then inside.
Cut out the circle you just made with the marker. If you did not use the black paper you can color it now with a marker as well as the tube and cardboard.
Then with school glue place the tube piece on top of the cardboard piece. Then glue the black paper circle on top of the last cotton ball.
Now add some glue inside the tube and place the cotton ball on top, with the paper side up. Cut a fine strip of red paper and glue it around the bottom of the tube to make a piece of trim.
Now using hot glue, place on top of the snowman.
